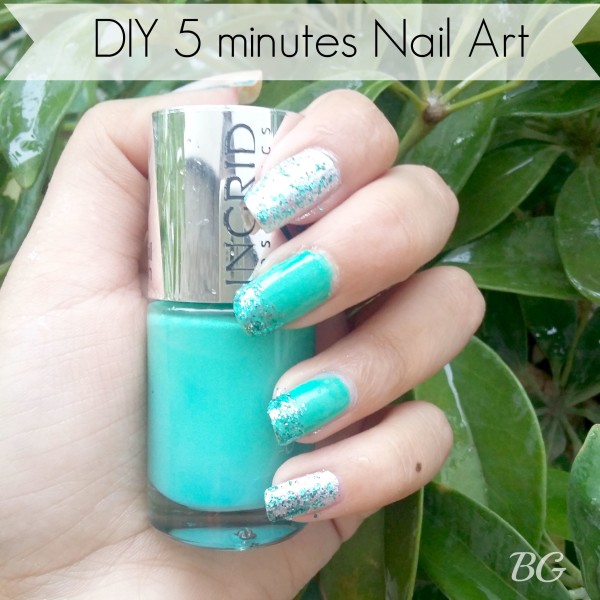
Nail Art Tutorial – Nail arts are always fun to do and can seriously get addictive. Experimenting with your nails is not always easy. We all surf the internet and find that one cute nail design picture that we want to try but never actually make it to the end.So how to make perfect nail designs your self at home ? This simple tutorial will solve your worry .Also see Top 10 Makeup brands celebrities use.
Step By Step Tutorial For Glittering Nail Designs

Today I will be show you an easy 5 minutes DIY nail art in a step by step process that you can wear at both day and night time. I call this nail art “green sparkles”. Before I begin with the nail art tutorial lets see what you will be needing for green sparkles:
Recommended to See : Summer Makeup Tips for Clear and Shinny Skin
You Will Need :-

- A silver metallic nail polish
- A turquoise green nail polish
- A sparkly turquoise nail polish
- A base coat
- A top coat
Before applying any nail polish apply a base coat to all your nails to protect them from getting yellow

Step 1: Apply the silver metallic polish o your index and little finger and don’t forget to do the same on your thumb nail.

Step 2: Apply the turquoise green nail polish on your middle and ring finger

Step 3: Once the silver base polish is dry apply a thin layer of the sparkly green nail polish

Step 4: Take the sparkly green nail polish and apply it on your middle and ring finger. Make sure to apply on 1/4 of the nail only. You don’t need to be very precise here.Voila! You are done with the green sparkle nail art in just 5 minutes. To seal your awesome nail art, apply a top coat to prevent the nail polish from chipping.

Isn’t the green sparkle nail art very easy? This is perfect for a beach day or a sparkle themed party. You can always do this fun nail art at ta girls night out or even at a sleepover at your best friend’s place.


